
Posting Photos of CORE trips on the CORE Website
Addendum to February 2016 Newsletter
This Post is supplemental to the detailed instructions on the CORE website on How to Upload CORE Photos. The use of Java scripts is unnecessary, and the easiest method is to use simple Drag and Drop to move photos from your desktop to the Fotki uploader.
Privacy note: when adding titles or comments to posted pictures, please respect your own and other peoples’ privacy. Restrict names to First Name & optional last name initial (e.g. Frederika W.)
Limit your Photos: When leaving a photographic record of your outing, please limit the number of photos, and avoid duplicates. Being concise these days is a virtue, so choose photos that make the best story of your terrific outing in as few pictures as possible.
Misplaced Files and Folders: If you do create a misplaced folder or album in the process, please email the CORE webmaster, and she/he will do their best to correct it.
Steps:
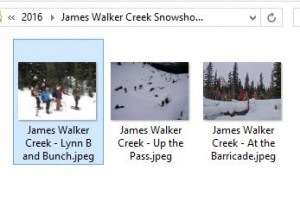
1-Organize your Photos and Label them |
1. Organize the Picture files you want to upload in a separate folder. Be concise, avoid duplicates, be discrete, title by file name to tell a story. You can use high-pixel files, Fotki will store them and they can be accessed for high-res download. |

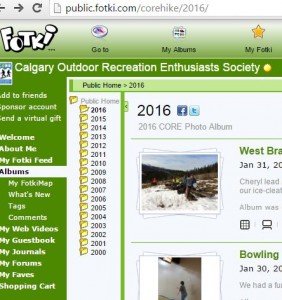
2-Select Photo Album in Activities Dropdown |
2. Open your web browser to the www.corehike webpage and Photo Album in the Activities dropdown menu. |
3-Select FOTKI My Albums |
3. In Fotki, select My Albums in the top tool bar. |
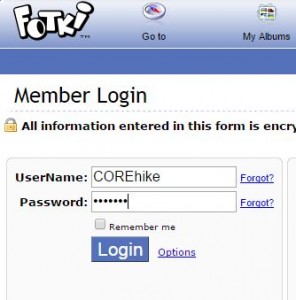
4-Login with COREhike Member Password |
4. LogIn as COREhike with member password. |

5-Select Current Year |
5. Select Current year in the Year list. |
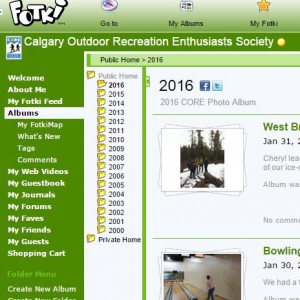
6-Select Create New Album |
6. Select Create New Album in the green left hand menu. |
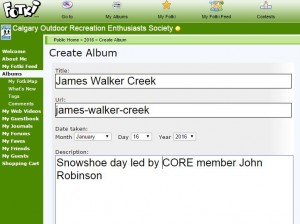
7-Fill in Title, Date and some trip highlights |
7. Fill in trip Title, Date (very important) and a sentence or two of description (who the leader was, who took photos, conditions etc) |
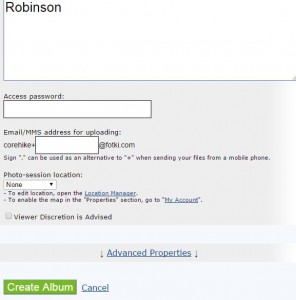
8-Select Create Album at bottom of page |
8. Select Create Album at bottom of page. Do not fill in password or other fields after the Description field. |

9-Drag and Drop Photos from Desktop Folder |
9. Select all the picture files in your desktop folder and Drag-and-Drop them into the Fotki Uploader (Right to Left in this screen capture). |
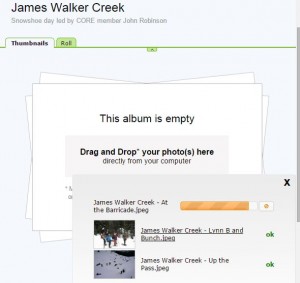
10-Photos Loading |
10. The photos will take a little while to load. You can watch the progress on the Fotki window. |

11-New Photo Album in Chrono Order |
11. Navigate to the current year photos albums, you will see your new album in chrono order. |
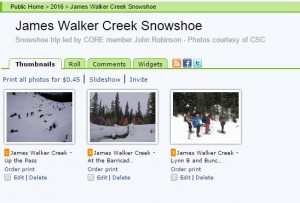
12-Ready to View |
12. Ready to view in Slideshow or Roll Down mode. |

13-Download High Res Photo |
13. Select photos to view individually. Select the down-arrow in a bucket symbol to load the high res version if available, then right click on the photo to download it to your desktop. |