By Longtime CORE Member Carol

Chilkoot Day 1
A trail full of contrasts and contradictions, the Chilkoot in Klondike Gold Rush National Historic Park straddles two countries, three eco-systems, and thousands of years of human history. Its flat, undemanding stretches have little resemblance to its challenging boulder pitches. Its rain-prone sections are far removed from the stretches of semi-arid landscape. Travel along its route can involve short, effortless days and excruciatingly long ones.
This is the trail that created a living hell for the Klondike gold seekers. Today it’s a backpacker’s paradise; a trail that intrigued my husband so much that he was motivated to organize a CORE trip there in 2003. Ten of us went, along with my son who was living in the Yukon at the time.
As members of a hiking club, we were used to hiking in the Rockies where conditions and terrain were more homogenous than along the 53-kilometre Chilkoot Trail. Lured by the prospect of adventure and the sheer beauty of coastal Alaska and northern British Columbia, we would discover rewards along the trail far more precious than gold. These treasures, however, came with the price of hard work. Over five days in the summer of 2003, we hauled ourselves up steep slopes, through water-logged rain forests, across sandy shorelines and past barren landscapes so inhospitable we dared not stop to admire them. We travelled through drenching rain, dense fog and bone-chilling wind. But we were also compensated by dazzling sunshine and spectacular Northern Lights.

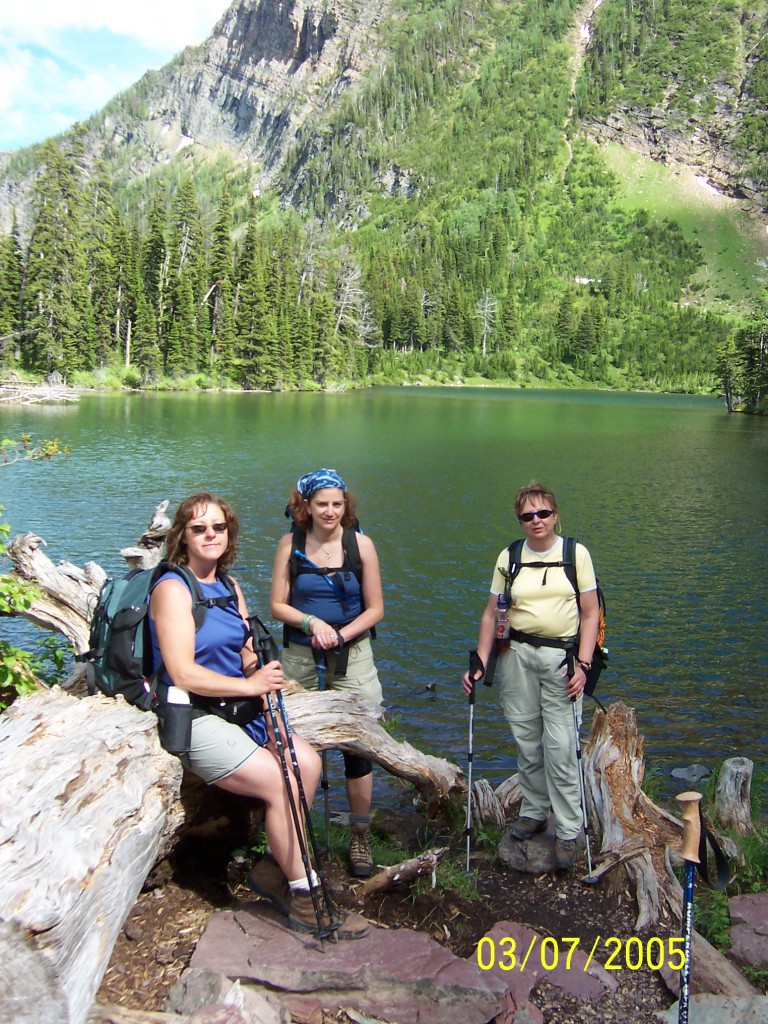
Isabelle and Carol trudging over rocks and roots
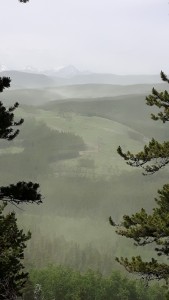
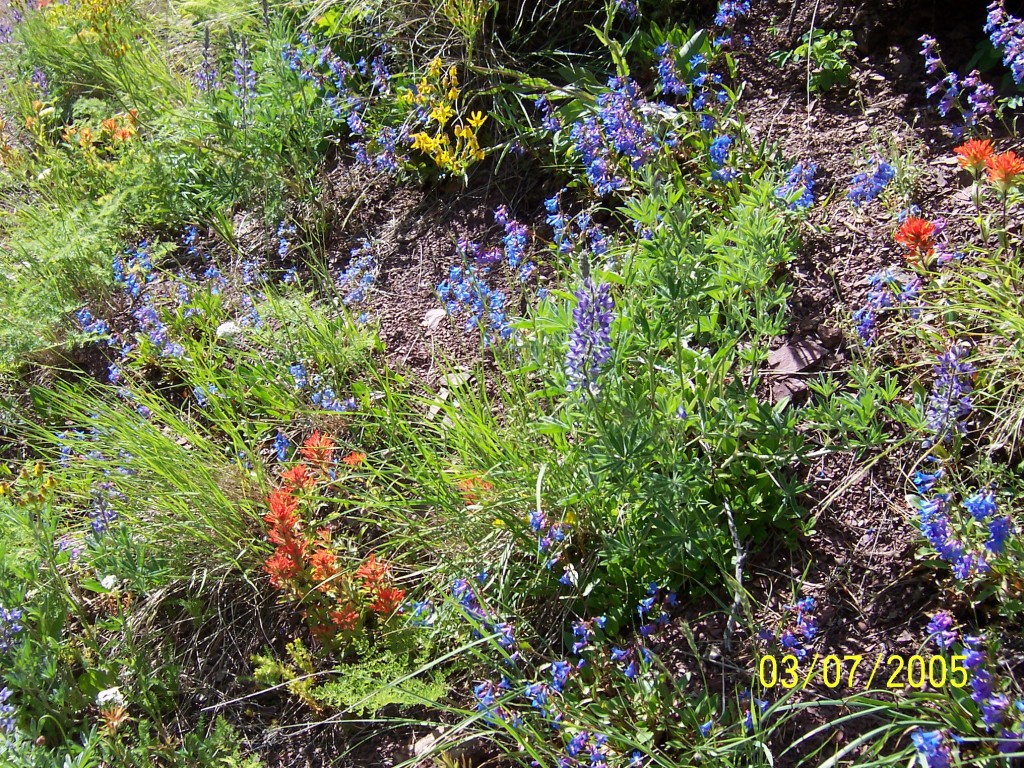
Each day along this historic route, changes in weather and landscape waited to catch us off guard or test our mental and physical mettle. We first hiked through the Pacific Coastal Rain Forest which offered stands of alder, cottonwood, aspen, western hemlock and Sitka spruce. Plants such as bunchberry, lady fern and devil’s claw flourished in this mild marine climate. Next we hiked into the Alpine Tundra Zone where the climate became sub-arctic and the risk of hypothermia increased. Finally, we crossed the Boreal Forest Zone, a drier region of less-dense forest and acres of rock.
Our first day began with a steep climb up a narrow, rocky path (a taste of what lay ahead), but soon we were on a wide, flat wagon trail that hugged the Taiya River all the way to Canyon City campground, our destination. Hiking was easy, the weather perfect, and the sighting of a grizzly catching salmon in the river put us in a good mood. We ambled into camp around 3:00 p.m. and settled in, anticipating an easy, eight-kilometre jaunt the following day.
Then the rain started.
The following morning we awoke to a transformed world; a very wet and misty world. We were grateful for the old log cabin that served as a warming shelter for the campground. Few were brave enough to cook outdoors nor eat at the one and only picnic table on the site.
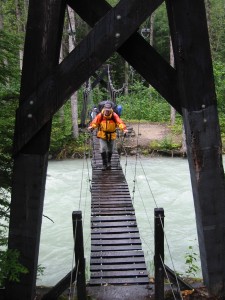
Canyon City ruins suspension bridge
After a soggy side trip to the Canyon City ruins, bouncing over a swaying suspension bridge, we were back on the wide, flat trail of Day 1, which quickly gave way to an undulating trail, full of ankle-busting rocks and roots. All day, we ascended and descended short, steep grades lined with an abundance of green growth, the rain our constant companion. As lunchtime approached, we were nearing Pleasant Camp, so pushed on until we saw the sign announcing it.
We chuckled at the irony of the name, as nothing could be farther from the truth; only rain-soaked trees and a swelling river greeted us. With no warming cabin in sight, we hunkered down amongst the trees, but not even the dense forest offered protection from the deluge. After a gulped lunch, we pressed on to Sheep Camp, encountering a shelter where we should have stopped for lunch out of the rain. We wondered how many others over the years had stopped short of its welcoming arms.
About four in the afternoon, the last of our group staggered into camp, completely drenched, despite their well-intentioned rain gear. The prime sites on wooden platforms were taken and the latecomers had to camp on wet ground, not far from the fast-rising river. The camp had two small shelters that rapidly filled with dripping clothes, hissing stoves and campers crammed together like too much gear in a backpack.
The rain continued all night, and we slept nervously, anticipating that some of our tents may be swept down-river by morning. Luckily we were still in one piece when we rose at 5 a.m. to get an early start on summit-day, the day we would go over the Chilkoot Pass. Later that day, we learned that the trail we had hiked over the previous two days was now closed because of rising flood waters.

Struggling up the Chilkoot Pass on Day 3
“Day 3, baby” had become our mantra for undoubtedly the hardest day of the trip. Before we could snuggle into warm sleeping bags that night we had to reach the 3,200-metre summit of the Chilkoot Pass and trek many kilometres to Happy Camp, our destination for the night.
To reach the top, we had to navigate 800 metres of near-vertical rock fields, in extreme weather conditions. In summer, the Golden Steps made famous during the Klondike Gold Rush, are neither golden, nor are they steps. The Klondikers went over the pass in winter, when the giant-sized boulders were buried by deep snow into which they kicked steps up the steep incline. Of course, they were carrying excruciatingly-heavy packs and made upwards of 30 trips with all their gear and food.
We left Sheep camp around 7 a.m. in the rain. But as we hit the first of the rocks, the rain stopped for a brief time. It was a welcome break from feeling drenched and soaked to the skin. Our group became spread out and the terrain got more and more challenging as we ascended up into the Alpine Tundra zone.

In the fog and mist on our way to the summit of the pass
To get to the Chilkoot Pass, we had to “climb” giant, angular, unstable boulders, piled on top of each other for as far as the eye could see – a difficult feat even without a heavy backpack. The pitch of the slope steepened as we got higher and higher. From the infamous Scales, where Klondikers had to stop to have their gear weighed, to the summit of the pass, the slope is 45 degrees. We found ourselves scrambling up and over slippery boulders, some the size of a small car, in the torrential rain.
There were large numbers of gold rush artifacts strewn over the slope to the pass; cables and fallen towers that once provided a tram-line for the men and women of the gold rush, old shoes, tin cans and shovels. However, in the rain and deteriorating weather conditions, we had no time to stop and soak up their historical significance.
The higher we went, the lower the temperature became. The wind picked up and a thick fog settled over the pass. The potential for hypothermia now added to the danger of slipping on the rocks. Fortunately, we all made it to the warming hut at the summit without injury, albeit some of us were close to hypothermic by that time.
The summit hut is on the Canadian side of the pass and is administered by Parks Canada. The warden on duty had thermoses of boiling water ready for us when we arrived for making a much-needed hot beverage. We were the last to reach the hut because I had struggled a lot on the rocks, partly due to an unbalanced backpack, the result of having to pack up very quickly in the morning downpour. I was so exhausted when we reached the hut, that we asked if we could stay the night there. The warden discouraged us, saying the trail flattened out and became much easier on the way to Happy Camp.

Ascent through the Mist – Day three going up the Chilkoot Pass summit
We soon found that his version of ‘easier’ was grossly exaggerated. After leaving the hut, we had to cross an unending rock field that seemed to go on forever and ever. I thought to myself, “I never want to see another rock for as long as I live.” M. went on ahead to set up our tents and let the others know that Harvey and I were going to be late arriving, because I wasn’t moving very quickly. For what seemed like hours, we slogged across swollen creeks and streams and were pelted by rain. We were hungry, tired, and had to keep moving or risk hypothermia. Soon it was dark and we were well overdue at Happy Camp. Miraculously, two fellows from the camp came out to greet us about a kilometre from our destination, a mighty welcoming sight!
For us, Happy Camp was definitely a misnomer. A miserable night was spent in sodden tents, trying to get warm in wet sleeping bags. I remember shivering severely for about an hour, before finally falling asleep. A couple of members of the CORE group slept in the warming hut, lucky them! The next morning, we put on our few remaining bits of dry clothing and headed for Lake Lindeman, our next campsite. Fortunately, the weather on the other side of the pass tends to be drier so, before long, we were basking in sunshine and our spirits began to soar.
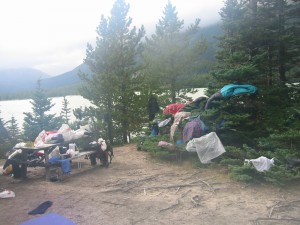
Lindeman Lake campground – Drying out
Day 4 on the Chilkoot Trail is a relatively easy trek over level ground but the strain and demand of the previous day had been draining, so, for me, the going was slow. We passed the remains of an old metal-framed boat and other artifacts of the Klondike Gold Rush. We arrived at the lake about 4 p.m. and quickly set up our tents. Soon the camp was strewn with soggy gear, as we attempted to dry sleeping bags, jackets and sodden socks, using the warmth of the sun and a light breeze off the lake.
Relieved that the worst was over, we celebrated in the roomy log cabin that served as the warming hut at Lake Lindeman. In the evening, most of us strolled over to the Parks Canada tent to receive our official certificates for doing the 53-kilometre trek. We visited an old cemetery where some of the Klondike gold rushers were buried.

Lake Bennett on Day 6
Tired but feeling jubilant that Day 5 was our last, the next morning we trudged slowly toward Bennett Lake and the ghost town of Bennett under clear skies and sunshine. Bennett, located in the far northwest corner of British Columbia, and pinched between Yukon and Alaska, was the site of a large tent city from 1897-1900 where the men and women of the Klondike built boats to carry them across Bennett Lake to the Yukon River, and then on to Dawson City. We had lunch at Loon Lake where two islands in the lake resembled the body and head of a loon. Believe it or not, we ended the day by crossing a desert in the middle of nowhere. For a few pleasant kilometres we hiked along sandy trail, much preferring the sand under our feet to the giant boulders of Day 3.
At Lake Bennett, the gods of the sky rewarded our tribulations along the trail with a spectacular display of Northern Lights! A fitting ending to our Alaska-Yukon-B.C. adventure.